Wow, four years have gone by since my article about upgrading PowerPath to 5.9 for vSphere 5.5 support. VMware is up to 6.5 on vSphere/vCenter, the web-based interface continues to suck, North Korea has ballistic missiles; wtf is going on.
Anyway, let’s get on with the show. My upgrade path was 5.5 to 6.5, with PowerPath 5.9 to 6.2. My steps were maintenance mode, remove PowerPath, reboot, “offline” upgrade to 6.5, reboot, install PowerPath 6.2, re-license. Skip ahead if you don’t want info on that vSphere upgrade or PowerPath removal.
vSphere Upgrade
Before starting, I recommend you get rid of your old PowerPath once you’re in maintenance mode. SSH in, run this if you’re on 5.5:
esxcli software vib remove -n powerpath.plugin.esx -n powerpath.cim.esx -n powerpath.lib.esx
or this if you’re on 5.5U2 or 6.0:
esxcli software vib remove --vibname=powerpath.plugin.esx --vibname=powerpath.cim.esx --vibname=powerpath.lib.esx
Reboot. Then start the upgrade.
If you’re not familiar with the offline bundle process, here’s a page that documents it:
https://www.vladan.fr/easily-upgrade-esxi-5-x-to-the-latest-esxi-5-5-update-1-via-cli/
Basically you download the offline bundle (a zip file) from the vmware site, stick it on a LUN your vSphere host has mounted, put the host in maintenance mode, enable ssh, log in, then run:
esxcli software sources profile list -d /vmfs/volumes/<your volume>/update-from-esxi6.5-6.5_update01.zip
That’s the current filename for the 6.5 offline upgrade. You MUST give the esxcli command the full path even if you’re in the same directory. It will spit out your options for profile names, typically you’d want the -standard option without the s, not the no-tools version or the s version. Then run:
esxcli software profile update -d /vmfs/volumes/<your volume>/update-from-esxi6.5-6.5_update01.zip -p <profile name>
It will upgrade, you reboot, now your host is on 6.5. Then we get to work on PowerPath.
PowerPath Licensing
First things first; if you’re using an older style ELMS license appliance, there’s a new kid in town. It is the PowerPath Management Appliance (PPMA). You’ll need the 2.2 release if you’re on vCenter 6.5; 2.1 doesn’t support it and won’t deploy correctly using the OVF on vSphere/vCenter 6.5. What does it do that is different? Well, it has the same command line RTOOLS stuff that the ELMS appliance has, so you won’t miss anything there. Where it gets interesting is the web interface; it’s a web-driven system that communicates with vCenter and your PowerPath hosts on your behalf (along with any non-vmware systems using PowerPath if you want it to). It will get all your vSphere hosts from vCenter, then talk to them to see if they’re using PowerPath, if they’re licensed, and can push licenses to them if that’s what you want.
A simple support ticket with your old ELMS license key is all you need to have them issue a new license key for your PPMA system. You’ll find your old key on your ELMS server in /etc/emc/licenses. You get your new license from them, paste it into the web interface of PPMA, bam, all your licenses are now there. No more running the stupid rpowermt stuff to license your hosts, query them to see if PowerPath has gone through its inevitable forgetting of its license, etc.
The 2.2 PPMA can manage older PowerPath versions too so you’re safe there.
So anyway, shut the old ELMS down and switch to PPMA; much better experience for new hosts, old hosts, and ongoing maintenance/licensing since it pulls all that data from vCenter. You will probably need to unregister the licenses and re-register unfortunately; do that via command line on the PPMA server:
rpowermt unregister host=192.0.2.1

rpowermt register host=192.0.2.1
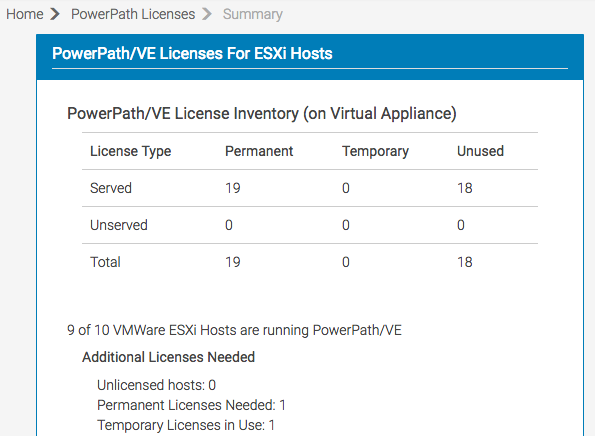
Here’s a cool screen shot:
PowerPath Upgrade
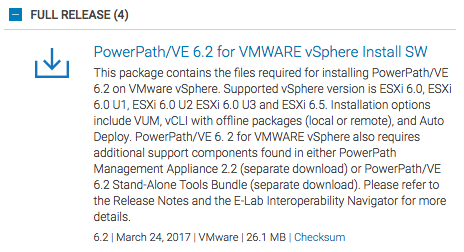
Grab your PowerPath bundle from EMC’s website. At the time of this writing, the 6.2 release is named:
PowerPath_VE_6.2_for_VMWARE_vSphere_Install_SW.zip
In their website it looks like this:
You’ll need a file from inside the zip; it will be named EMCPower.VMWARE.6.2.b126.zip. This differs from the old 5.9 release where the zip you downloaded from EMC is what you fed to Update Manager; you need to extract the VUM file from in the overall zip since it includes other goodies.
Hopefully you’re on vCenter 6.5 now so you can use the new appliance-based update manager, but if not, you’ll want to use the fat client for vCenter/vSphere 6.0 since those versions don’t have update manager working properly in the web interface.
I skipped over 6.0 so my instructions are specific to 6.5 using the Flash-based (barf!) web client. I suspect 6.0 fat client will be similar but probably have things in different places, so when I say “along the left” or similar, it may not be there.
Okay, so click the name of the Update Manager server along your left under Servers. On the ‘Getting Started’ screen that shows in the center, click the “Manage” tab:
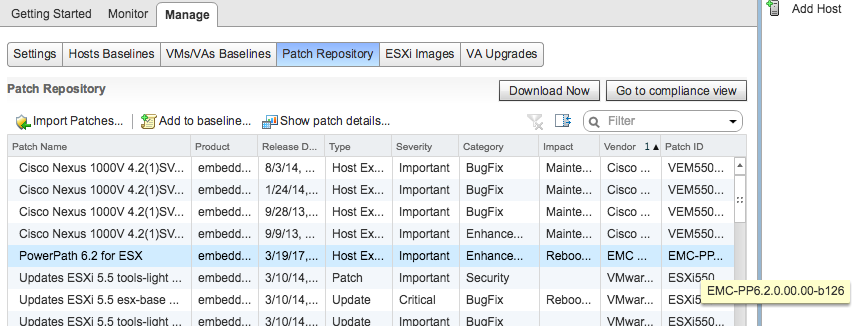
Notice that happy little “Import Patches” button? Click it and feed it your nice PowerPath zip file:
Congrats; now your new PowerPath 6.2 install will show in your Patch Repository list as:
PowerPath 6.2 for ESX, category “Enhancement”, Vendor “EMC”
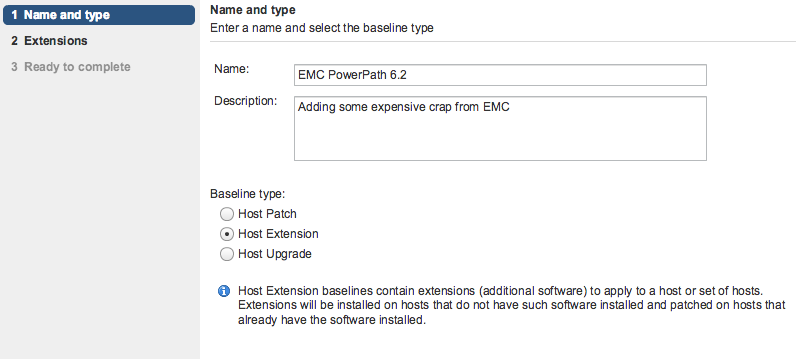
Okay, flip over to your Hosts Baselines now and create a new custom baseline; I called mine “PowerPath 6.2” and it is a type “Host Extension”:
On the following screen, select your new PowerPath extension as the one you want:
Okay, now, before you go any further, when I did this, the new PowerPath 6.2 added itself to the built-in “Non-Critical Host Patches (Predefined)” baseline group. I find this very annoying because I use that group, and I don’t want PowerPath in it. That group doesn’t appear to have any method of editing, so you’re stuck with it. An extension is not a patch, so why it’s added there I have no idea, and since it’s a built-in, you can’t edit to remove PowerPath from it.
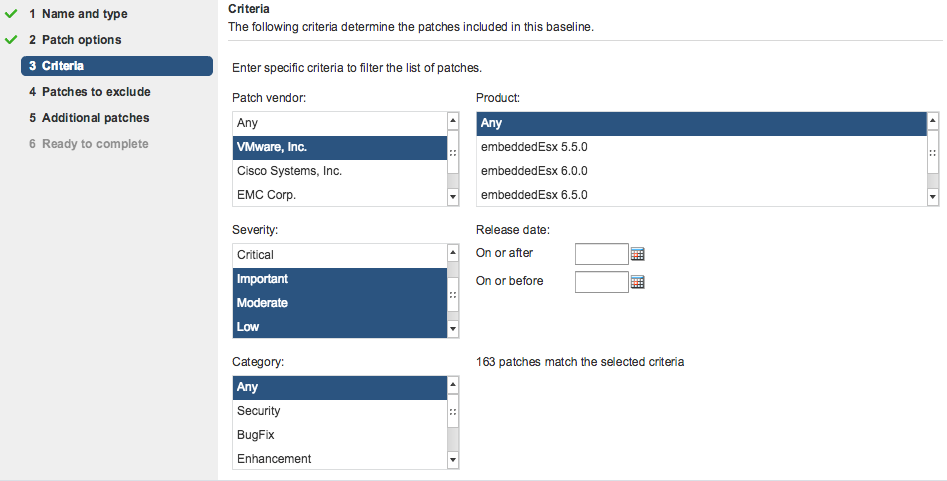
What I did was create a new baseline called “Non-Critical VMware-issued Host Patches”, set it to dynamic, then chose the vendor as vmware, all but Critical severity, any category, any version:
Now in my case, this resulted in a baseline with 163 patches, where the built-in one has 168. The reason for this is it caused the four available Cisco Nexus 1000V patches to be left out. If you have other third party software installed, make sure you account for it with its own baselines as needed.
Okay, with that all fixed up, now go to one of your hosts. If you had a previous PowerPath baseline attached to it, detach that and attach the new one. If you’re behind on vSphere patches, I’d not attach yet; get those updated, reboot, then attach the new PowerPath 6.2 baseline, remediate, reboot, should be good to go.
